Building a Segbot (with a Completed Board)
<- Previous Step
Next Step ->
Assembling the Plastic Shell
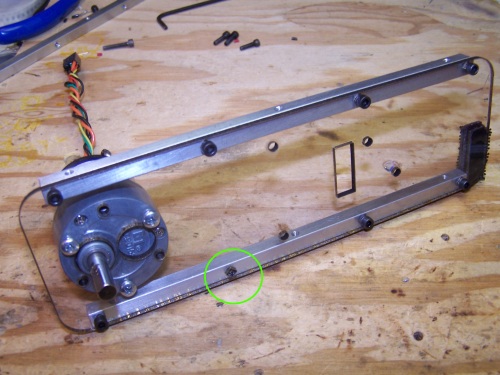
To begin, attach the motors to the side plates of the plastic shell. To do this, you will need three M3 screws per side. Check the picture below to make sure you place the motor on the correct side of each side piece of shell. The correct setup for both sides of the Segbot is pictured below. Note the orientation of the diagonal holes (circled in green) when the motor is placed on the correct side.

At this point, attach two aluminum bars to each of the side panels using seven 3/32'' hex screws. Do not place an eighth screw in the hole circled below. This hole will be used to attach the standoffs. The results should appear as below:
Next you will need to attach the stand-offs to the sides of the plastic shell. Assemble the stand-offs using the pieces shown below. Make sure that you attach the small hex-shaped bars using the holes closest to the ends of the long bars and a small hex screw. Attach the standoff to the side panels as shown. Screw the long hex screw through the standoff, the plastic, and the open hole from the outside. Screw the small hex screw in from the inside side of the side panel (through the plastic and then into the the standoff). The end product should appear as below:
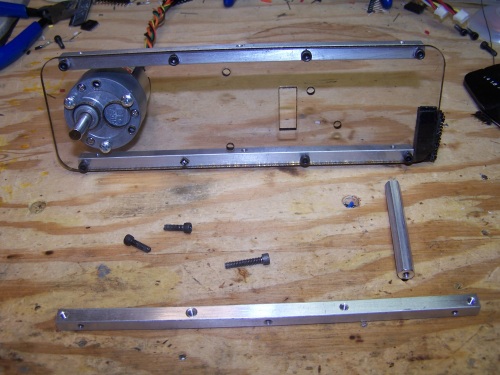
Required Parts
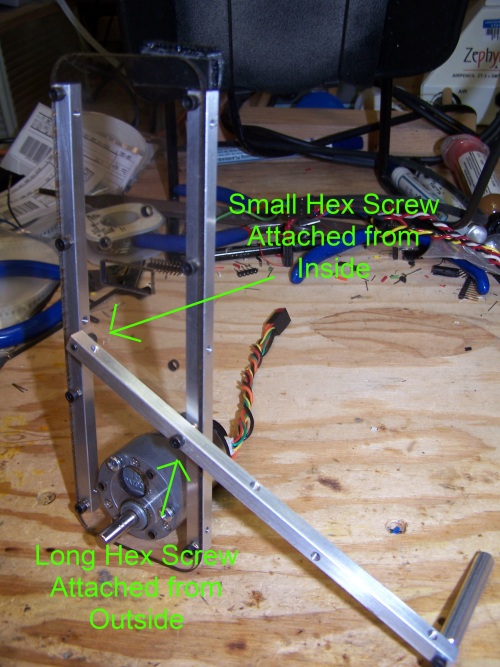
Attached Standoff Bar
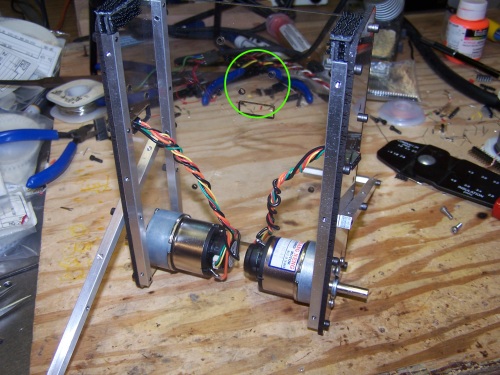
Attach the side panels of the shell to the back using six 3/32'' hex screws. Notice that the back panel has more holes in it than the front panel. Also make sure that the two holes above the square opening appear as in the picture. It must be orientated this way for the board to attach correctly.
Note the Orientation of the Diagonal Holes
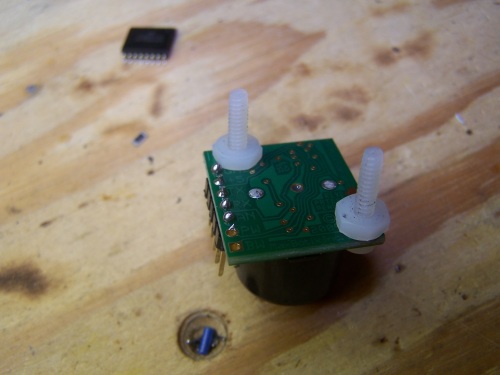
Next you will need to put the Ultrasonic sensor on the front plate of the plastic shell. Before you can do this, you must solder a five pin male header onto the sensor. On the back of the sensor, it should be apparent that you have connected the header to GND, +5, TX, RX, and AN. Using two more plastic screws and two plastic nuts, prepare the sensor to be attached to the front plate. The header and screw attachments should look as follows:
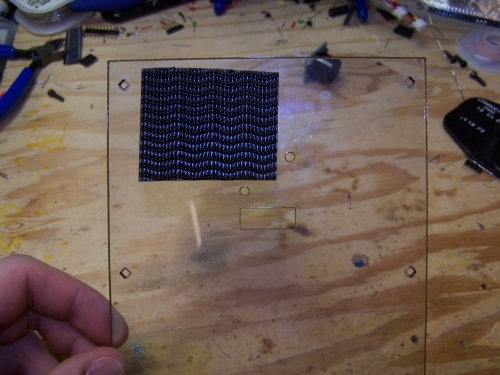
This is a good time to attach the velcro to the front plate for holding the battery while the Segbot is operating. Attach a small piece of velcro, about 2''x1.5'' to the inside of the front plate. It should appear as in the following picture. Use the diagonal holes to make sure you are attaching the velcro to the correct side. Also, make sure not to cover any holes with velcro.
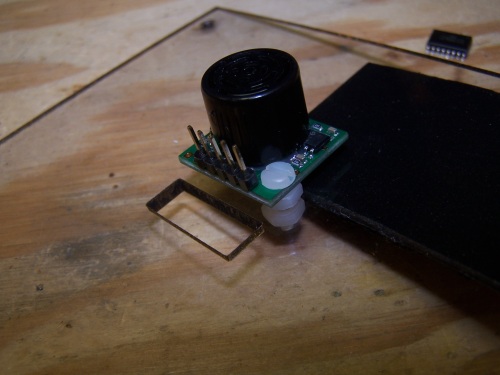
Finally, attach the ultrasonic sensor to the front plate using two more plastic nuts. The result should look like the following picture. After you have attacged the ultrasonic sensor, set the front plate aside and move on to the next step.
<- Previous Step
Next Step ->
Home ♦ Updates ♦ Videos ♦ Contact Information